 |
refreshrestyle.com
|
To get a professional look prep the surface before you start. You’re like me, temped to just crack open a can of paint and start painting. Don’t do it yet…

5 thing to do before painting your wall!
- Look for any damage on the wall. Repair it with spackle, sand it, remove any dust.
- Remove electrical plate covers.
- Stir your paint well.
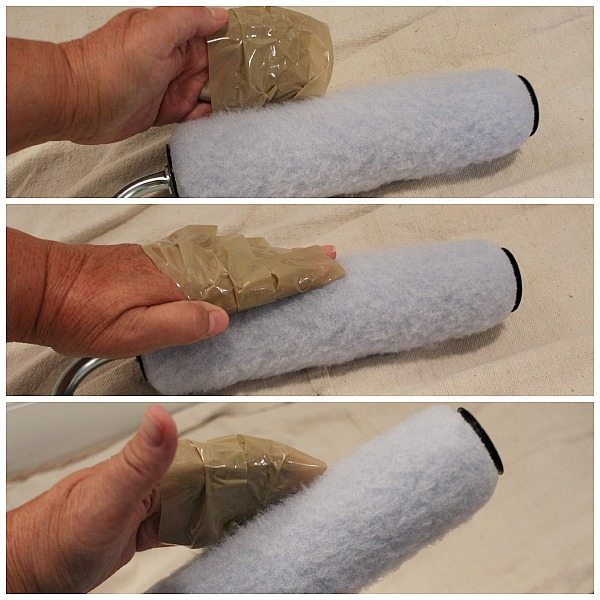
- Use tape to remove fuzz from your roller.
- Cut in first, paint the wall before it dries.
Repair – I had to repair these places on the wall, there was no way that just painting them would have fixed that damage. I used a light weight spackling with primer and it dries fast, like within 30 minutes! After it dries, sand it smooth and wipe off the dust.
If the hole is deep, apply several coats of spackling, let it dry and sand in between.Use a repair kit if the damage is wide.
Remove electrical plates, it’s so much easier and neater than trying to cut around them.
I used my HomeRight QuickPainter Pad Edge Painter, you just draw the paint up from the can. This little guy makes edging easy with less mess! Just pump to add more paint to the pad.
And for the wall, I used the EZ Twist Paintstick, I painted without a roller pan. Can you imagine how nice that was! Let me tell you, it was awesome! You may also notice that bath cloth laying there. No, I didn’t bath in it  I alway keep a wet/damp cloth handy for wiping off any little mistakes that I make.Because unlike Bob Ross, they are not happy little accidents. Some people use baby wipes.
In case you’re wondering. I did not want to change my wall color, I just wanted to repair it. This is the area at the top of the stairs. I didn’t have the original can of paint. I painted one whole wall, from edge to edge, I didn’t want to risk the paint not matching. Luckily, we had this paint left over from the basement. It’s Sherwin Williams Mindful Gray. One of favorite colors, right now anyway.
As you can see, the wall looks great! Inside the white circle is where the pimple, I mean damage was.
credit/source: http://refreshrestyle.com/how-to-prep-walls-before-painting/
Note: This wall painting was DYI project of the original writer which is my source.


No comments:
Post a Comment
Note: Only a member of this blog may post a comment.